Day 3 Creative Coding: Making pictures
I am enjoying this creative coding so much I can hardly speak or write. It’s so easy to get lost in the flow of creativity. I have mostly been learning through experimentation. What happens if I change that number? Trying changing the colour of an element to see which bit it is making happen. What other variations can I think of?
New things I have learnt:
In Processing’s rules of precedence, the multiplication operator has a higher ‘strength’ so it is evaluated first, rather than computing the calculation from left to right as you might read it. * and / operators have higher precedence than + and -.
So y = 5 + 3 * 4 = 5 + (3 * 4) = 5 + 12 = 17
PEMDAS rule – Parentheses, Exponents (raise to power), Multiplication, Division, Addition, Subtraction.
Or BODMAS which stands for Brackets, Orders (ie Powers and Square Roots, etc.), Divide, Multiply, Add, Subtract
Using saveFrame() is very sensitive – if you don’t press key very quickly you get lots of the same image saved (TIFFs with different names). So I have reverted to using a file name saveFrame(“new.png”) and then renaming it manually. I’m not getting the workflow right. I am ending up with lots of duplicated images. When I save the sketch code it saves all the other images that I have saved as well again.
I have bookmarked the Processing page about colour but putting it here as well as it is a very useful thing to look back to https://www.processing.org/tutorials/color/
I also added a new colour picking tool (“Color Selector Plus”) that has more scope to it, and decided to use hex colours rather than RGB (because for me it is clearer then which argument relates to colour and which to transparency).
Transparency (Alpha) values range from 0 to 255, with 0 being completely transparent (i.e., 0% opaque) and 255 completely opaque (i.e., 100% opaque). I am trying to remember this simply by higher number more solid. Transparency is a nice quality to use because of the extra depth you get when lines and shapes overlap.
I also played a little with strokeWeight. I think you could do something interesting with randomising that as well.
Images I have made
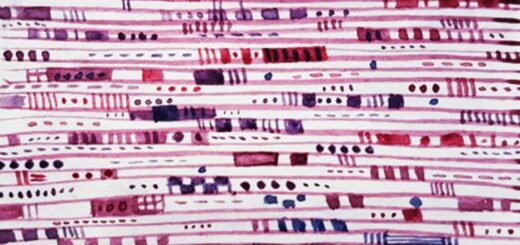
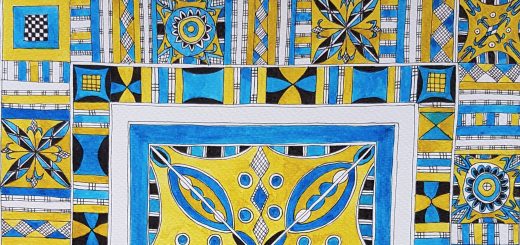
Below are some of the images I have made today.

Code
This is the code for the last 3 images above.
/*
 * Creative Coding
 * Week 1, 02 - Draw your name! (part 2)
 * by Indae Hwang and Jon McCormack
 * Copyright (c) 2014 Monash University
 * Amended code CC-BY Karen Cropper

 * This program allows you to draw using the mouse.
 * Press 's' to save your drawing as an image.
 * Press 'r' to erase your drawing and start with a blank screen
 *
 */

// variables for the angle (in radians) and increment
float angle;
float inc;

void setup() {
  size(1200, 675);
  background(240);

  rectMode(CENTER);  // rectangles drawn from the centre

  // initialise angle and inc to 0
  angle = 0;
  inc = 0;
}

void draw() {

  /* draw a rectangle at your mouse point while you are pressing
   the left mouse button */

  // map the mouse x position to the range (0.01, 0.08)
  inc = map(mouseX, 0, width, 0.01, 0.08);

  // incremment the current angle
  angle = angle + inc;

  if (mousePressed) {
    // stroke relating to the rectangles and line from mouse point
    stroke(255);
    // shape filled white had transparency setting 30 but have removed that
    fill(255);

    //rectangle with centre where mouse is and height and width specified
    rect(mouseX, mouseY, random(5), random(5));

    // draws a line from previous mouse position to current mouse position.
    line(mouseX, mouseY, pmouseX, pmouseY); // pmouse is the mouse position at the previous frame

    // oscillate the radius over time - started at 30 - trying different numbers
    float radius = 100 * abs( sin(frameCount) );

    float first_tempX  = mouseX + radius * cos( angle);
    float first_tempY  = mouseY + radius * sin( angle);
    float second_tempX = mouseX + radius * cos(-angle);
    float second_tempY = mouseY + radius * sin(-angle);

    // draw some lines and circles using transparency approx 30%
    // color yellow #FFEF00 from color selector plus tool
    stroke(#FFEF00, 75);
    line(mouseX, mouseY, first_tempX, first_tempY);
    //added another stroke with red color #ED1E28
    stroke(#ED1E28, 75);
    line(mouseX, mouseY, second_tempX, second_tempY);

    //This is making a circle at the end of the line a random radius up to figure in brackets
    //It was taking the same fill as the rectangle until fill added below
    float temp_w = random(5);

    // Top circle added color blue #3F49CC
    stroke(#3F49CC, 75);
    fill(#3F49CC, 75);
    ellipse(first_tempX, first_tempY, temp_w, temp_w);

    //Bottom circle added color green #22B149
    stroke(#22B149, 75);
    fill(#22B149, 75);
    ellipse(second_tempX, second_tempY, temp_w, temp_w);
  }

  // save your drawing when you press keyboard 's'
  if (keyPressed == true && key == 's') {
    saveFrame("new.png");
  }

  // erase your drawing when you press keyboard 'r'
  if (keyPressed == true && key == 'r') {
    background(240);
  }
}

Recent Comments