6 hours a week, my A**e!
This Creative Coding course is great. I’m really enjoying it and it’s stimulating my creativity as well as learning the technical side of the coding, but the idea that it can fit into 6 hours a week is laughable. It feels like 60 hours, but I’ve certainly been at it for more than 16 hours this week. And I still haven’t got through all of week 2 material yet. That’s because I am doing my best to embed each bit, rather than rush on to the next thing and retain nothing. So I’m letting the connections form in my brain, repeating exercises in a slightly different way, and thinking about how I might do something interesting with a different visual feel still using the same simple principles.
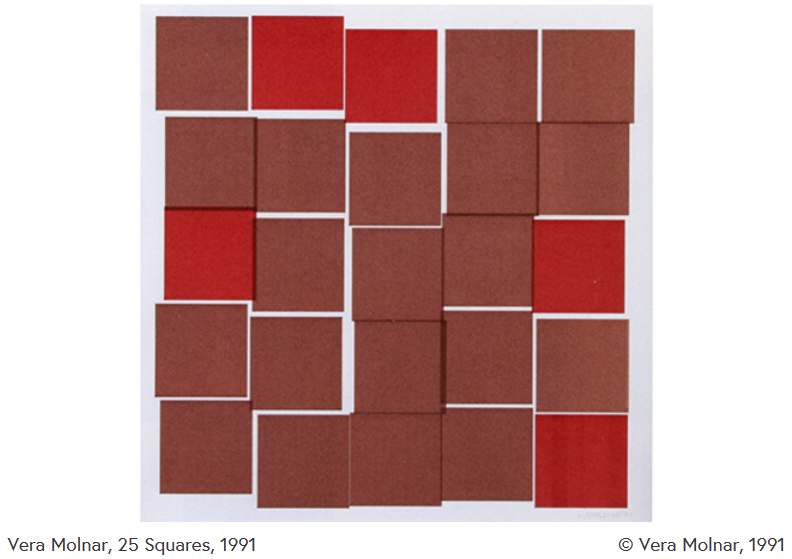
With that in mind, I approached the first exercise of week 2 with the idea of how different could I do things while still keeping to the ‘brief’. The challenge was to look at the image by Vera Molnar and reproduce something along the same lines.
Gallery submission
On 13 August, I submitted 2 of the images I had created that evening to the course group on flickr and I was very pleased to see this morning that one of them was selected to display in the course. The two images are below. The one with the blue background was selected.
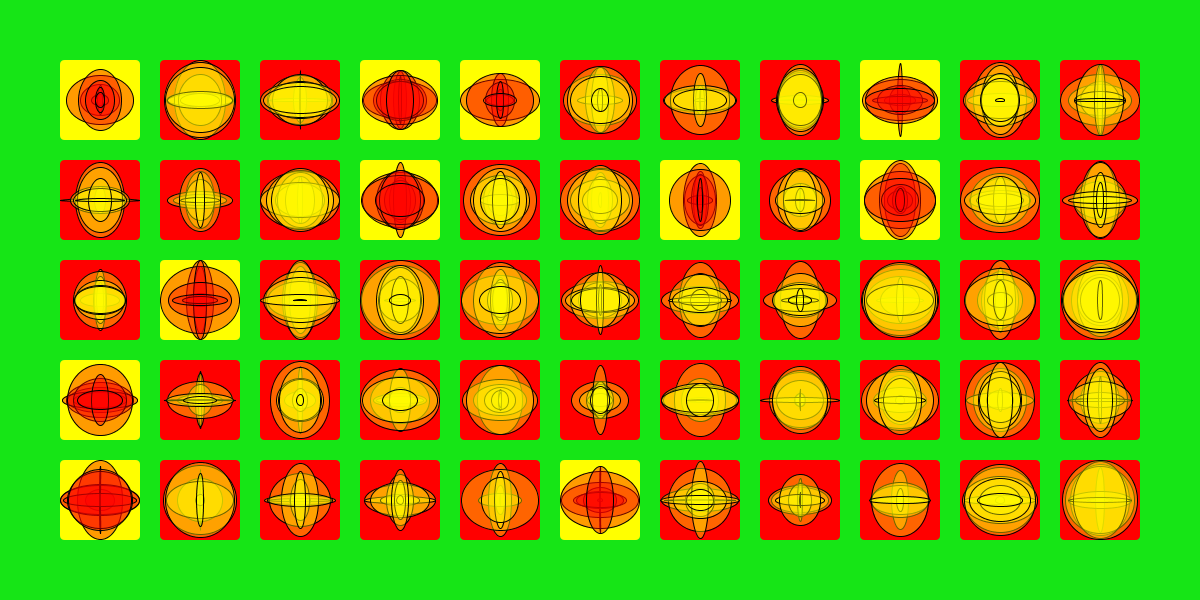
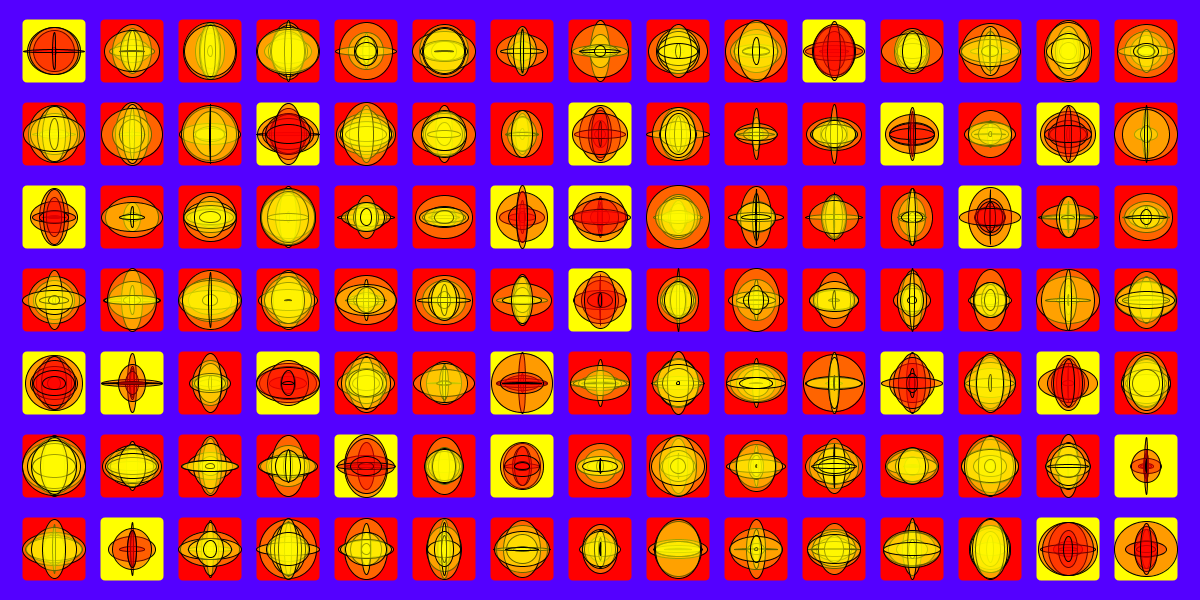
My thinking was that the original image we were looking at by Vera Molnar was a grid of evenly spaced squares, which had the regularity disrupted (by shifting them by a random amount in a random direction from the perfect position). The order and regularity was also disrupted by the colour being randomly changed in a ratio of 1 in 5. (Actually it could have been based on 1 in 4 or 1 in 6 and just by chance have landed on 5 out of 25 but 1 in 5 was easy to work with). The display was also a square which simplifies some of the calculations.
I did do a version almost the same, but then I challenged myself to do something the same but different in a rectangle. Instead of disrupting the regularity by moving the squares, I decided to have a randomised ‘other’ shape, and for the colour change went for changing the combination of colours.
This theme of squares on a grid is something I have returned to often in my own art before this course. For me there is a metaphor about regularity and conformity co-existing with difference. Each square is different, but you can see that they all have a similarity and exist within a set of rules (a metaphor for society?). There’s also an aesthetic quality of the combination of colours that I am always drawn to.
Some considerations for the code
I am already thinking that I want to write the code so that it’s scalable – so that I can test out how it looks at a size that fits on to my screen, but then run it with a much larger display size, so I can save the image for possibly printing a decent scale.
I have looked at available canvas sizes and I am interested in the size 24″ x 12″ which is a ratio of width = 2 * height. For printing of 300 dpi minimum, I calculate that requires pixel dimensions of 7,200 x 3,600. There is also a standard size 40″ x 20″ (which would need to be at least 12,000 x 6,000 pixels to print well.
My display size for testing things out is 1200 x 600.
To be able to scale, anything that is set, such as the margin and the gap between the squares and even the radius of curve of the corners, needs to be as a proportion of either the height or the width. The one thing you need to watch out for is the stroke weight.
I decided to base everything on height.
I also want to be able to save the images with a unique name every time and not have to keep changing to make sure I don’t overwrite anything that I wanted to keep. So I added in a bit that makes the file name by date and time.
The code
This is a polished up version of the code that I used for the selected image. I’ve put it below and also in pastebin.
/*
 * Creative Coding Exercise
 * CC-BY Karen Cropper
 * Licence CC-BY 4.0 August 2015
 *
 * This code creates a grid of squares on a rectangular display area
 * The layout is calculated based on a margin and then fitting a
 * number of squares to the height, then using the square size to
 * calculate the gap between squares in the x direction.
 *
 * The rectangles and ellipses all draw from the centre
 * Fills from the centre of the display window
 *
 * Automatically saves image no overwriting adds a date/time part
 *
 */

 // setup function -- called once when the program begins
void setup() {

  // set the display window in pixels
  size(1200, 600);

  // set the rectangle mode to draw from the centre
  rectMode(CENTER);

  // Only want everything coded in the draw section to run once
  noLoop();


}// end of set up

// draw function -- called continuously while the program is running
void draw() {

  /* Defining color mode as HSB and
   * variables so that can change them easily in one place
   * when want to try out different colour combinations
   */
    colorMode(HSB, 360, 100, 100); //set mode to HSB
    color baseCol = color(260, 100, 100); // background colour
    color mainSq = color(360, 100, 100); // squares
    color otherSq = color(60,100,100); // square random
    color line = color(260, 0, 0); // stroke/line where appears
    color mainEl = color(60, 100, 100, 100); // ellipses
    color otherEl = color(360, 100, 100, 100); // ellipses random

  /* Defining variables for calculation inside draw function
   * bacause if define in set up wont be called here
   */
   float marg = height/15; // margin in pixels
   int yNum = 7; // number of squares in y height direction must be odd
   float yGap = 2*marg/yNum; // gap between squares in y direction
   float xNum; // number of squares in x width direction to be calculated
   float xGap; // gap between squares in x direction to be calculated
   float sqSize; // size of square to be calculated
   int numEl = 8; // number of times ellipse will draw on one point

   // put in background
   background (baseCol);

   //calculate square size
   sqSize =(( height - (2 * marg ) - ((yNum - 1)*yGap))/yNum);
   // print in window to check values
   println (height+", "+marg+", "+yGap+", "+sqSize+" :");

   // calculate gap in x direction

   xNum = floor(width - (2 * marg) + yGap)/(sqSize + yGap);
   println("xNum is "+xNum);

   xGap = ((width - (2 * marg ) - (xNum*sqSize))/(xNum - 1));
   // print in window to check values
   println (width+", "+marg+", "+xGap+", "+xNum+" :");

   // draw the shapes
   // setting integers for x and y postition so can use for other shapes
   float xPos, yPos;

   // loops
   int iStop = (floor(xNum/2))+1; // because starting at centre then going out either side
    int jStop = (yNum/2)+1; // because starting at centre and going above and below
    for (int i=-(floor(xNum/2)); i3000) {
               strokeWeight(5);
            } else {
               strokeWeight(1);
            } //end else


                // change colour randomly - using same number as for square
                switch(colCase) {
                  case 0:
                    fill(otherEl);
                    stroke(line);
                    break;
                  case 1:
                    fill(mainEl);
                    stroke(line);
                    break;
                }
            //draw ellipse
            ellipse(xPos, yPos, random(sqSize), random(sqSize));


          }// end of k

      }//end of j

    }//end of i

  // saving without pressing a key because will only be running through once (noLoop)
       String humanName = "ellipsesquares"; // change this to a meaningful name

       // this then makes a unique filename with the date in a sortable order
       // saving as png as I think it is crisper for this code
       // you can change the part at the end to jpg or tga or if you leave that out it will default to TIF
       String fileName = humanName+"_"+year()+month()+day()+"_"+hour()+minute()+second()+".png";

       saveFrame(fileName);
       println("The file "+fileName+" has been saved"); // confirms that has been saved and what name

} // end of draw function
Reflections
I’ve progressed and answered for myself the 2 issues that I mentioned in my day 2 blog post. The ellipse ‘baubles’ in the centre of each square are a theme that I started there.
I’m having lots of ideas of things I’d like to try and I am having to write them down in a notebook as I haven’t got time to execute them as fast as I’m thinking of them. In particular I looked up Paul Klee images after someone mentioned the skyline image reminded her of him. I’ve included some images from him in a separate blog post as they have stimulated lots of ideas of things to try out.
I still don’t know how to do the texture on the inspiration image but I think it is ‘noise’, covered in week 4.
I printed all of the foldout notes today for all of the weeks as I don’t have the printer attached to my laptop, and it is always a bit of a faff to switch the desktop PC on and get the printer working again. I found I wasn’t really looking at them as a resource so far on my computer instead I am tending to Google each bit of code that I am not sure about – mostly ending up on the processing.org reference material.
More info about Vera Molnar
- Biographic details on compArt daDA: the database Digital Art (a great resource to spend some hours on).
- Small entry on DAM.
- Vera Molnar’s YouTube Channel

Recent Comments